

We bet almost everyone thought about creating their YouTube channel at least once in a lifetime. Especially entrepreneurs, businesses and aspiring bloggers are concerned about it quite a lot.
How to create a YouTube channel right and avoid common pitfalls we’ll reveal in this peace. Naturally, launching a YouTube channel is just a starting point. To make your channel thrive, you need to optimise it, track the performance, promote it and make it grow.
Create a YouTube Channel: Perks
Marketers and businesses use videos and YouTube as a way to reach their audiences and increase brand awareness. Bloggers entertain, sometimes educate their followers and make a living out of it.
All in all, starting a YouTube channel has quite a lot of advantages, here are some to name:
-
Quick start. Creating a YouTube channel won’t take longer than 10 minutes of your time.
-
It’s free. But you will need some equipment to shoot and edit videos.
-
Videos are easy to digest. People are subject to consuming video content a lot easier than reading.
Tip: Use 4K Video Downloader to download video content of any kind to your PC.
-
Many niches aren’t taken. Yes, YouTube has a rather high competition level, but there are definitely niches that you still can take. And quality content is at even lesser supply.
Create a YouTube Channel: A Step-by-step Guide
-
YouTube account registration.
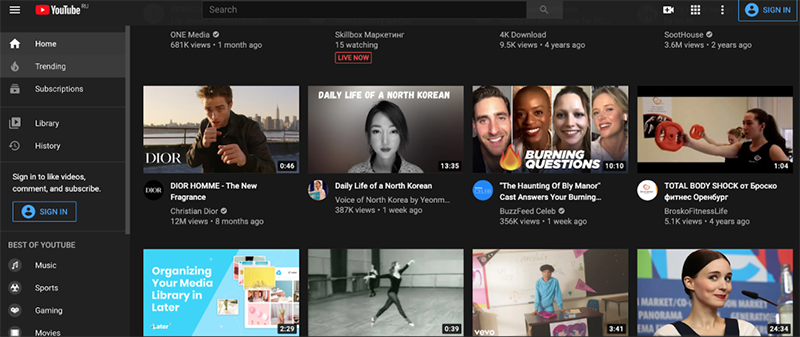
First of all, you need to create a YouTube account. Head over to YouTube.com and click on the Sign In button at the top right corner of the screen.
Then click ‘Create account’.

You can use any email address, not necessarily Google’s. So if you don’t have a Google account yet, you won't be asked to create one. Use your real phone number or the one you have access to any time: you might be asked to send confirmation codes. Thus you’ll be sure no one will break into your account and your channel.
Agree with the terms of use and privacy, and then press ‘Next’ to proceed.
-
Creation of a YouTube channel.
To launch your first YouTube channel, go to the main page of the YouTube site and find ‘Create a channel’ button under your profile icon. Click on it.

You will be asked to create a channel, enter your name and upload a profile picture from your Google account or select a custom name. Pick what you wish by pressing ‘Select’.

Then enter your channel’s name, upload a profile picture, type a channel description and add links to your social media if you have any. Press ‘Save and Continue’ to proceed.

If you struggle with creating a channel’s name, here are some hacks for you to help:
-
Choose your own name if you want the channel to be your blog or diary. You can also use your nickname from any of your social media or pick a name your friends or family call you. Just keep in mind that the name of the channel should be clear and easy to remember.
-
If you’re starting a brand or a company channel, name it as your brand.
-
Use keywords related to your niche—for example, makeup, science, history, tutorials, hacks, and so on. Thus you will help other users discover you.
Congratulations! Your channel is now created. Now you need to customise it.
If you want to change your channel pfp (profile picture), you can do it anytime you want just by hovering the cursor over the pfp icon, pressing the camera icon and uploading an image from your device.
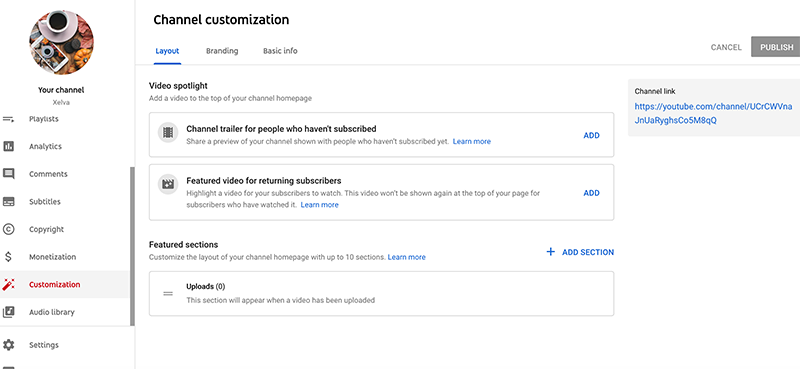
YouTube has a customisation studio where you can update and change the look of your channel whatever you want. To do so, find the ‘Customize channel’ button. You will be redirected to the Studio.

There you can add a banner image that will be placed across the top of your channel like this:

Or change your profile picture, add a watermark that will appear in each of your videos, change your channel layout, edit description, links, and contact info.
In the Studio, you’re able to add subtitles, choose tracks from the audio library, track channel analytics and, most importantly, apply for the monetisation program offered by YouTube.
-
First video upload.
Channel is nothing without content, so you will have to create videos and regularly upload them to your channel. Here’s how to add your first one.
You can do so right from the main page of the channel by pressing on the ‘Upload video’ in the middle of the page.

Then choose a file from your computer and add information about it - title, description, thumbnail, click if the video can be watched by kids, add tags, set up automatic subtitles, recording date and video location, choose category, manage comments and choose who can find your videos (all users, nobody or people you give the link to).

You can also schedule the video to go live when you want or set it as an Instant Premier so that all your viewers can watch it all together at the same time and communicate with each other in the chat.
Once you’ve set up all the necessary settings, press ‘Save’. Congrats! Your first video is now uploaded to the channel.
How to Make a Youtube Channel Private
If you want to limit the access to your videos, you can make your channel private or available to only those who have the special link.
This will be useful for entrepreneurs who want to open videos to only those clients who paid for this, bought an online class and so on.
So, you can restrict the access to some videos the following way:
-
Open the main page of your channel and press ‘Manage videos’.
-
Find the ‘Upload’ tab and pick the videos you want to make private. Find the ‘Edit’ button, choose the ‘Visibility’ tab and tap on it. There you can choose to make the video private, public (visible to everyone) or unlisted (available to those with the link).


Another way to do so is to click on the word ‘Private’, ‘Unlisted’ or ‘Public’ next to the video, click on it and choose from the option from the list.

Apply the same to all videos you want to hide from the public.
YouTube Channel Statistics
As you grow your YouTube channel and fill it with videos, you will be able to track your channel’s performance. These insights will help you understand which videos work and which don’t and create better content.
To find your channel stats, you need to go to the Studio and find the tab ‘Analytics’. This tab will provide you with the following information:
-
Channel performance within a certain window of time (day, month, week or any custom period).
-
Total and average watch time
-
Reach
-
Engagement
-
Traffic sources
-
Impressions
-
Top videos
-
Top playlists
-
Audience insights: when they’re active on YouTube, watch time from subscribers, top geography, other videos your viewers watch, top subtitle language, age and gender and more.

How to create another YouTube channel
You want to differentiate your channels and decided to create another channel for vlogs, streams or tutorials? You can easily create the second channel. And no, you won’t need to create another YouTube account for that.
To start another channel, take these steps:
-
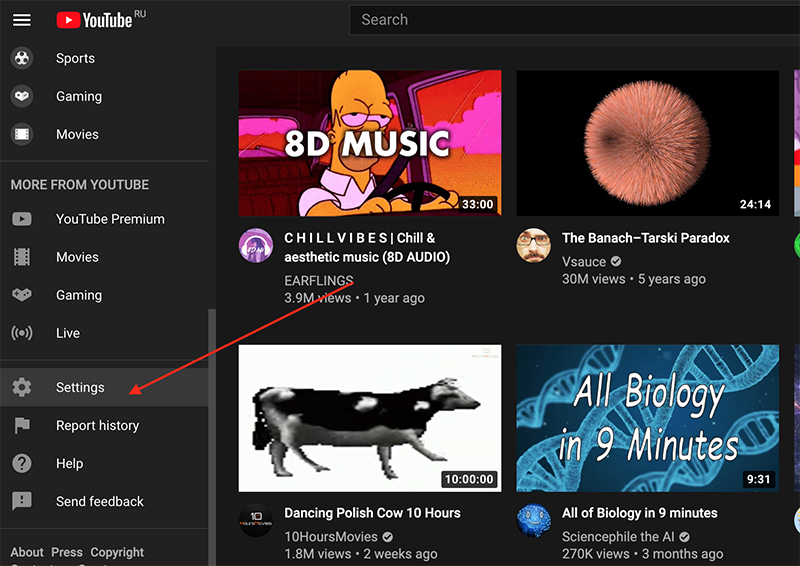
Open Settings on the left menu on the main YouTube page or main page of your current channel.
-
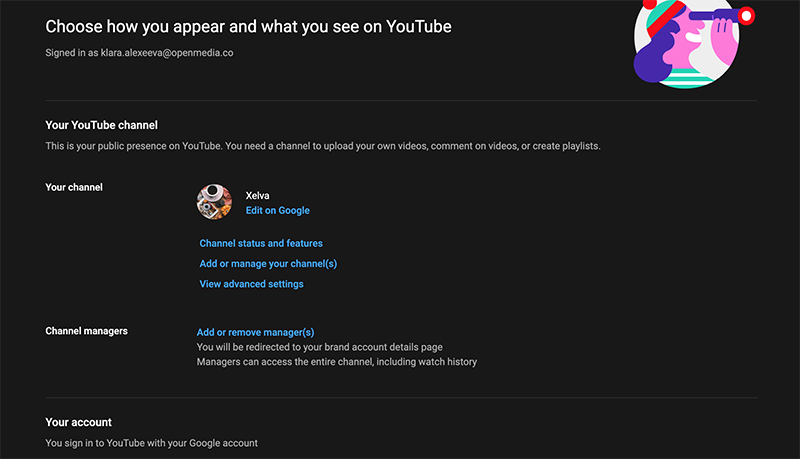
You’ll land on the Account page. There, find ‘Your Channel’ and ‘Add or manage your channel(s)’. Press it.

-
Press ‘Create a new channel’ and repeat all the actions from the beginning of this post. That’s it!
Now you know how to create a YouTube channel, upload videos and customise it! Support us and subscribe to our 4K Download YT channel where you’ll find plenty of useful guides on how to use our fantastic apps!
 SHARE ON TWITTER


Thanks for feedback
Your comments will appear here shortly. Please spread the word about us in social networks.