

If you create Reels, TikTok videos, or content for YouTube, a quality voice-over is a must to engage your audience and make the content piece more accessible. A good voice-over can help convey the message of a video, make it more memorable and impactful, or create a sense of professionalism and authority. We’re not even talking about growing an audience and boosting the views since if the video sounds good, the chances that people will close it are significantly lower.
But how do you record a high-quality voice-over at home? That’s what this piece is all about.
Tip: If you want to extract audio narration from any YouTube video, use 4K YouTube to MP3, and it’ll save only audio in high quality.
What Is a Voice-Over?
A voice-over is a narration or commentary that is recorded and played over a video or other audio track. It’s a non-diegetic sound element, meaning that it is not part of the on-screen action. Voice-overs can be used to provide information, explain concepts, set the mood, or create a sense of drama.
Films often use voiceovers to provide narration, backstory, or character thoughts. For example, the voice-over in the film "The Shawshank Redemption" tells the story of Andy Dufresne, a man who is wrongly convicted of murder and sent to prison.
In TV shows, voice-overs provide exposition or explain technical concepts. For example, the voice-over in the documentary series "Planet Earth" narrates the natural world.
Voice-overs are also becoming increasingly common in video games, where they’re used to provide instructions, narrate the story, or create a sense of immersion. The voice-overs in the video game "The Last of Us," which are essential to storytelling, are one of the examples. But what can’t be made without a voice-over at all is an educational video since a voice-over here is used to explain concepts and provide instruction.
The good news is that with the right setup and approach, you can achieve remarkable voice-over quality right in the comfort of your home.
Might be interesting: How to become an audiobook narrator
How to Record a Voice-Over: 3 Tools for Desktop, iOS, and Android
Waveroom
Waveroom is an online recording studio that captures high-quality audio even if the Internet connection is unstable or lost during the session. With Waveroom, the audio is recorded at 48 kHz and is delivered in uncompressed WAV, so you can be sure the voice-over will be captured just as crisp as you want it to be.
How to record a voice-over for a video with Waveroom
-
Log in to your Waveroom account or create it if you don't have one.
-
Click Create Room.
-
Set your Video, Audio, and Record preferences under the video preview in the Devices tab.
-
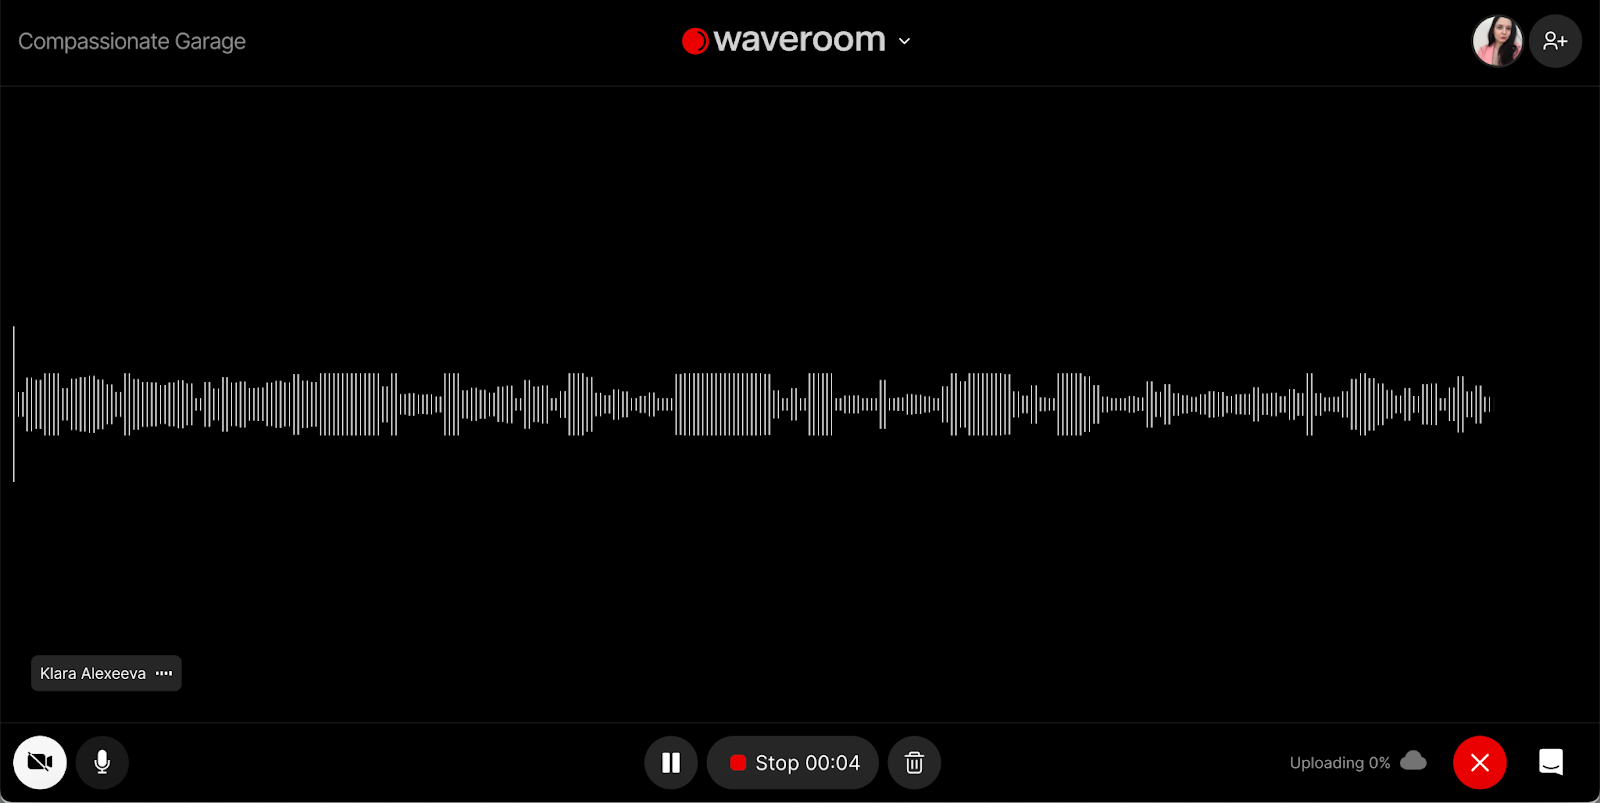
Click the Go to Test Record button to see how you're going to look and sound, or head over straight to Start Meeting to start recording.
-
Once you've finished the recording, Click Stop Recording.
-
Wait a few seconds while the meeting recording is being saved and press the cross button in the left corner to leave the room.
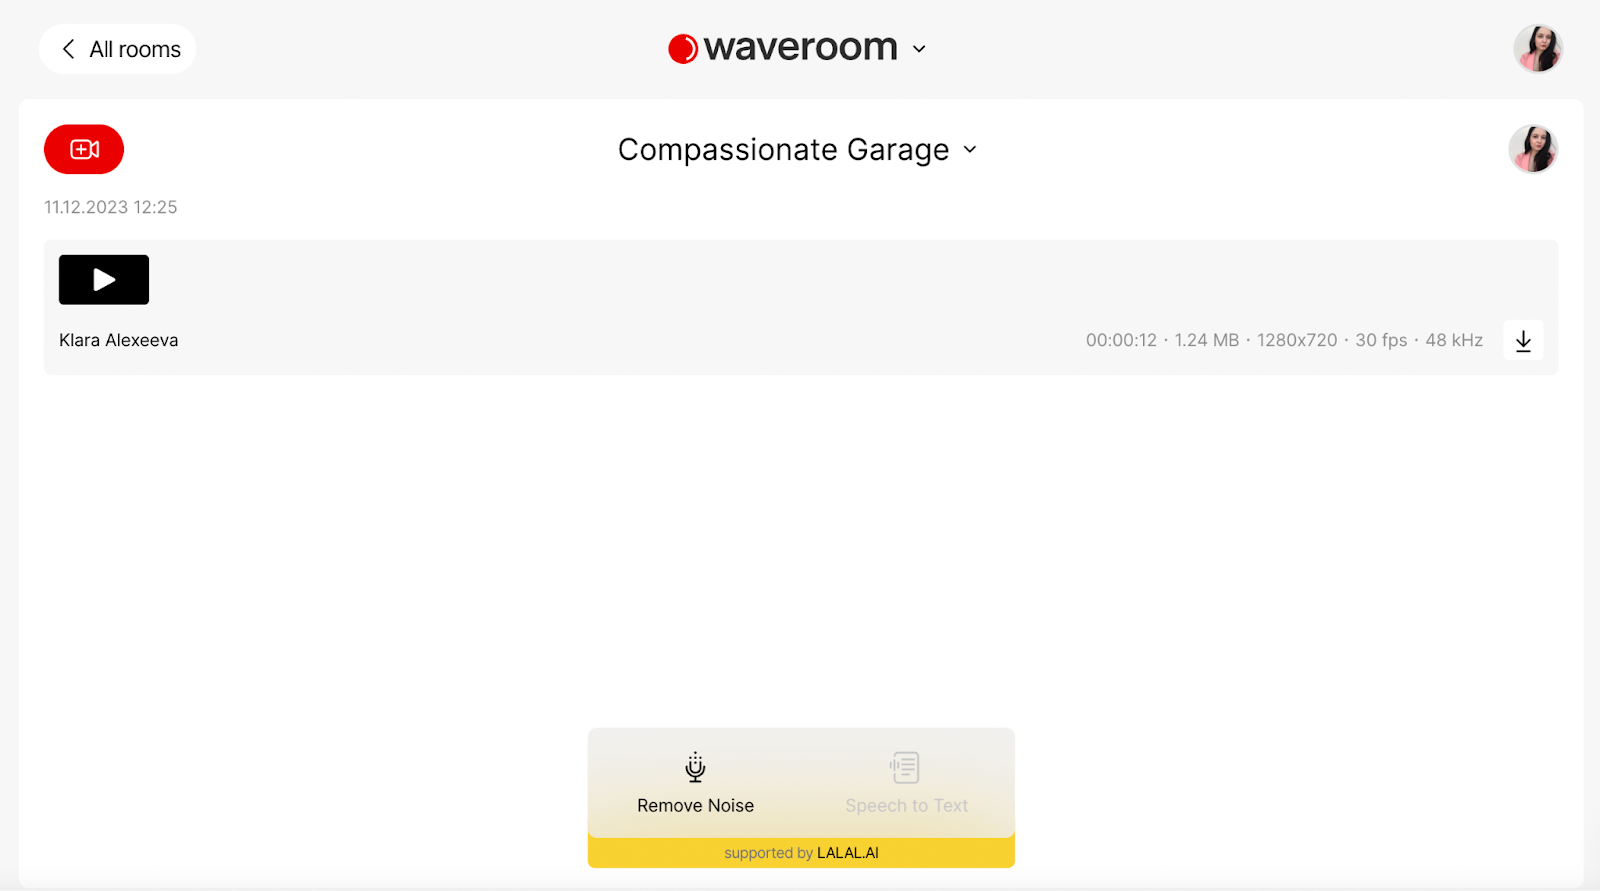
You will get back to the room that stores all the recordings you've just made, whether audio-only or video. Here, you can play and download the locally recorded video and audio files of each person who participated in the meeting.
If you've recorded a voice-over in a noisy room and some ambient sound has seeped into the recording, follow the remaining steps to cancel it out.
7. Press the Remove Noise button at the bottom of your screen to get rid of noise from all the recordings in the room.
The noise removal feature can be applied to both audio and video tracks.
All the tracks that have been post-processed are labelled with a noise removal icon.
8. Export tracks by pressing the downward arrow icon and selecting the content type.

That’s it! Now you can edit the voice-over if needed and add it to your video.
Voice Memos (iOS & macOS)
Voice Memos, a built-in audio recording application, seamlessly integrates into Apple devices, including iPhones, iPads, and Mac computers, providing a convenient platform for capturing and managing audio recordings. Its intuitive interface streamlines the process of recording, pausing, and organising audio files. Voice Memos further enhances its functionality by offering basic editing capabilities, allowing users to trim recordings and refine their content.
A particularly noteworthy feature of Voice Memos is its integration with iCloud, ensuring seamless synchronisation across multiple Apple devices. This means that recordings captured on one device are automatically accessible on all other associated devices, fostering a unified audio experience across Apple's ecosystem.
Sharing voice memos is effortless, with options ranging from email and messaging apps to third-party applications. This flexibility empowers users to seamlessly share their audio content with colleagues, friends, or anyone else they desire.
Easy Voice Recorder (Android)
Easy Voice Recorder is an effortless and user-friendly audio recording tool tailored for Android devices. Its intuitive interface streamlines the process of capturing, managing, and sharing audio files, catering to users seeking a no-nonsense recording experience.
The app embraces versatility by supporting multiple audio formats, allowing users to match the recording format to their specific requirements. Additionally, it empowers users to customise the recording quality settings, balancing file size and audio fidelity to suit their preferences.
For users seeking enhanced control, Easy Voice Recorder seamlessly integrates background recording, enabling continuous audio capture even when the app is not active or the device is locked. This feature proves invaluable for capturing audio discreetly or uninterrupted.
The app goes further by facilitating organisation and management of recordings within its interface. Users can rename files, categorise recordings, and even set reminders for specific recordings. This level of control ensures recordings are easily identifiable and accessible.
Embracing seamless sharing capabilities, Easy Voice Recorder empowers users to share their recordings via email, messaging apps, or third-party applications. This flexibility eliminates barriers to collaboration and ensures recordings are readily disseminated.
How to Record a Quality Voice-Over? Best Practices
What can be easier than just speaking to a microphone, you must be wondering. Well, creating a voice-over is not as simple as it may seem. Good articulation, pronunciation, and proper recording equipment are just a few aspects that turn regular blah-blah into a professionally recorded voice-over.
Take this advice into consideration if you want your voice to sound perfect in the video.
1. Set up the recording environment
-
Choose a quiet room: Choose a room that is free from noise and distractions since this will ensure that your voiceover is clear and free from background noise. If you have limited space, consider using a vocal booth or recording booth to isolate your voice from external sounds.
-
Treat the room with soundproofing: If you're recording in a room with echo or reverb, use soundproofing materials like acoustic panels or curtains to reduce reflected sound and improve the overall sound quality of your voice-over.
-
Position the microphone correctly: Place the microphone about 6 inches to 12 inches away from your mouth, ensuring that the microphone is pointing directly at your mouth. The ideal distance will vary depending on the microphone type you are using.
2. Choose the right microphone
-
Consider your budget and purpose: There are a variety of microphones available at different price points. If you're on a tight budget, you can find affordable USB microphones that offer good quality for basic voice-overs. For professional-grade recordings, consider investing in a condenser microphone or a dynamic microphone.
-
Mind the type of voice-over: If you're recording a spoken-word voice-over, a condenser microphone is generally recommended for its sensitivity and ability to capture nuances in your voice. For narration or voice-overs that require a more robust sound, a dynamic microphone may be a better choice.
3. Warm up your voice
-
Just like any muscle, your voice needs to be warmed up before you record to ensure optimal performance and prevent fatigue or strain. Perform some simple vocal exercises such as humming, lip trills, and tongue twisters to warm up your vocal cords and prepare for recording.
4. Read through the script several times
-
Practice reading the script aloud several times to familiarise yourself with the content and ensure you are comfortable with the delivery. This will help you to deliver the narration in a natural and confident manner.
5. Modulate your voice
-
Vary your pitch, tone, and pacing to keep your voice-over engaging and avoid monotone delivery. Use emphasis, pauses, and inflections to add emphasis and convey the intended emotion or mood.
6. Record multiple takes
-
Don't be afraid to record multiple takes of the same segment. This will give you more options when editing and allow you to choose the best take that best conveys the message and tone of the voice-over.
7. Use noise reduction and audio editing software
-
Once you've recorded your voice-over, use noise reduction or audio editing software to remove any unwanted background noise. This will help to improve the overall sound quality and make your voiceover more professional.
8. Proofread the script
-
Before finalising your voice-over, carefully proofread the script to ensure there are no errors or typos. This will help to maintain a professional and polished overall presentation.
That’s it! With these tools and recommendations, you’ll take your voice-over quality to the next level.
 SHARE ON TWITTER


Thanks for feedback
Your comments will appear here shortly. Please spread the word about us in social networks.